Hacking the Sonos Ray - Part 1: the Teardown
The Sonos Ray is the cheapest and simplest soundbar made by Sonos. Slightly more expensive than the price of two Symfonisks but with an optical audio input and IR receiver, I was curious to see if this device could be hacked to be a Sonos Amp alternative for a quarter of the price.
A bit of recent history
When Ikea released the Symfonisk speaker it opened up the Sonos system to a new era of hardware hacking. A bi-amped smart speaker, cheap, and easy to take apart, rewire and then tune using Trueplay - all of a sudden you could build a smart speaker pretty cheaply. Youtube became full of people that had modded the Symfonisk speakers to drive subwoofers and floorstanding speakers. But then it kind of stopped there. What about the other Sonos speakers?
The Symfonisk (and Sonos one) are kind of unique in the sense that their speaker driver setup is really easy to get your head around - 2 channels powering 1 woofer, 1 tweeter. It's a stock standard bi-amped setup with an active crossover, easy to hook up to a speaker with a woofer and tweeter combo. All the other sonos products have multiple class D amps driving a whole bunch of different sized and tuned drivers.
The downside of the Symfonisk is that they don't have any inputs, so using them to extend the audio of your TV can only be done wirelessly through Airplay which introduces a latency you need to overcome.
Teardown time
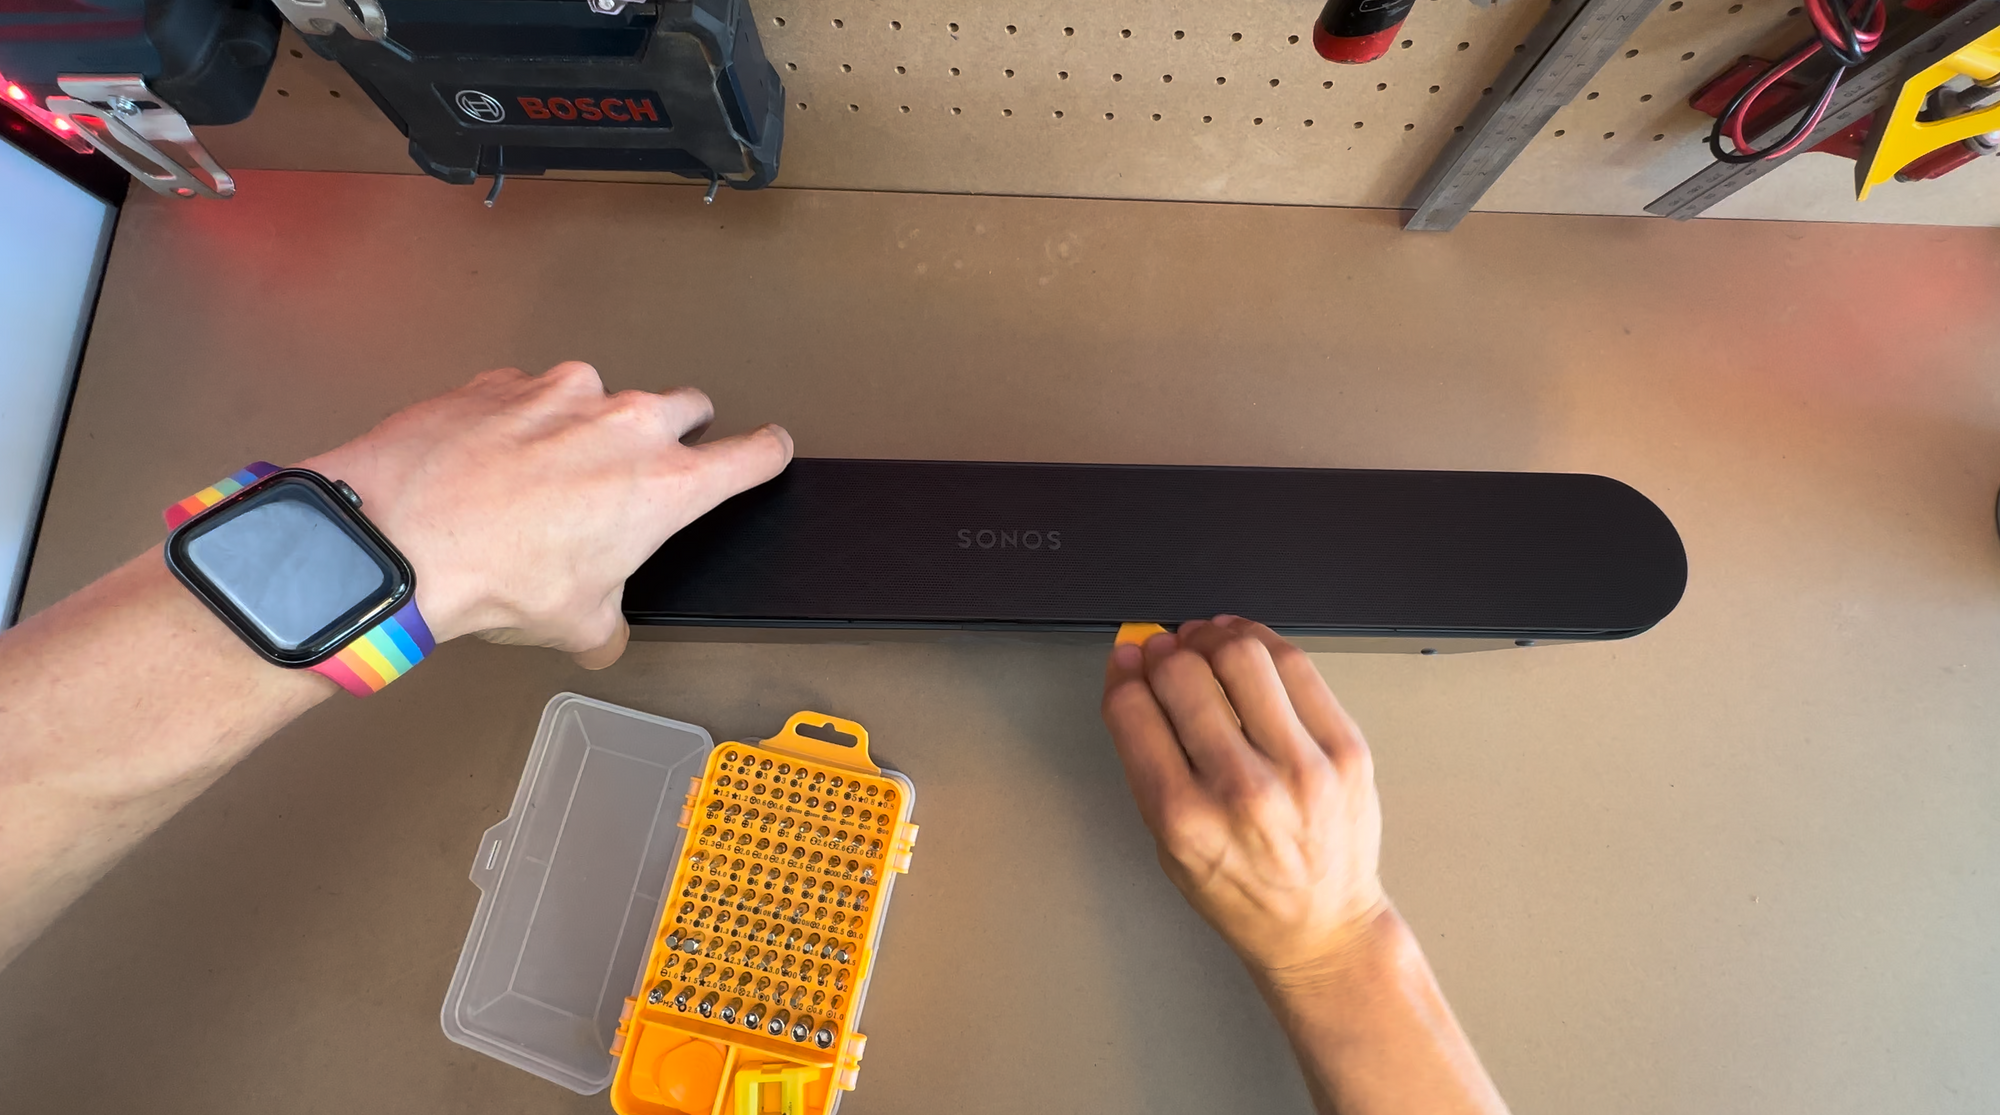
The Sonos Ray was released in 2022 was released as a bare bones, 2 channel stereo Soundbar with optical audio in and a low price tag. The driver setup is super simple - 1 woofer and 1 tweeter either side powered by 4 class D amplifiers. Basically two of the Ikea Symfonisks in one unit and, most importantly, with an optical audio input. This thing is as solid as the reviews out there say it is - punching well above its weight with bass and soundstage, they've done some clever engineering with the woofers and the way the unit is ported.
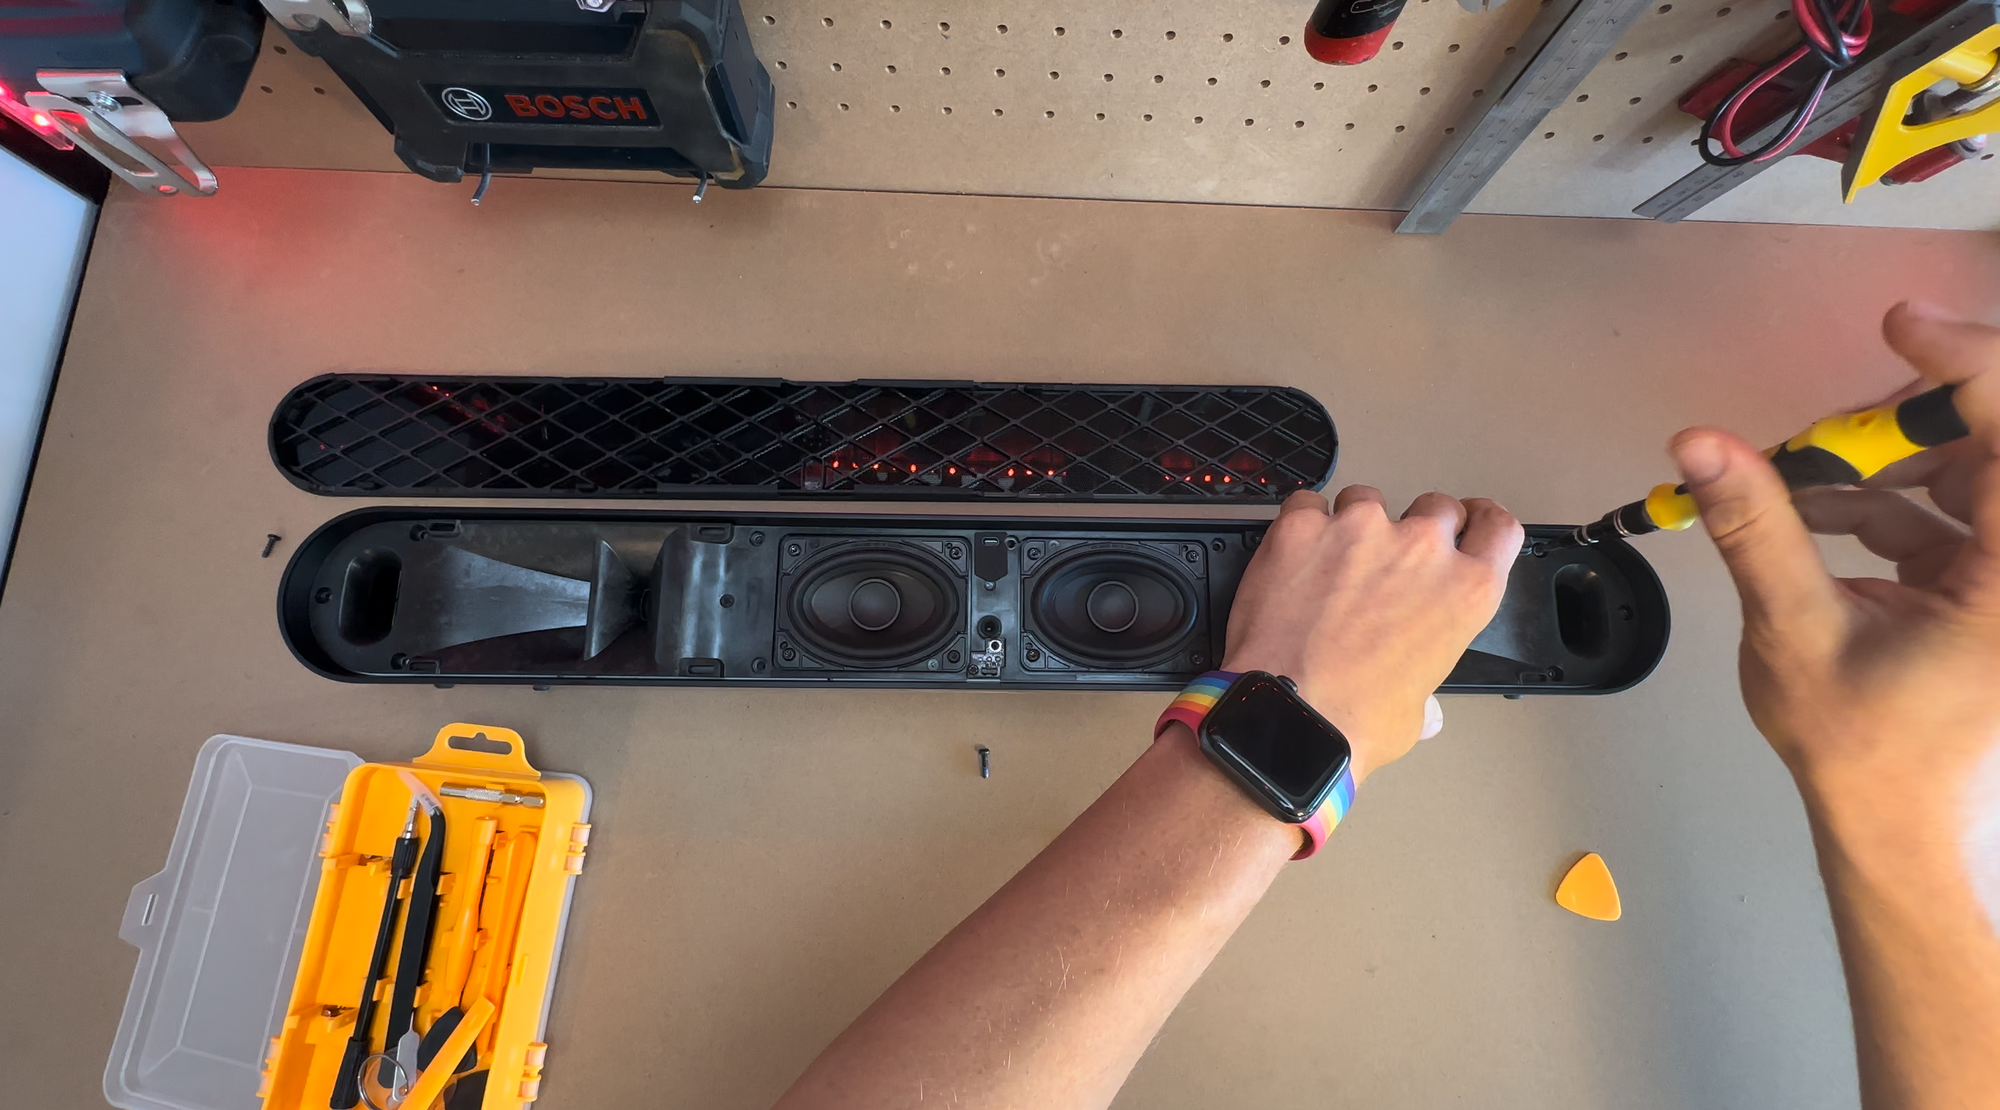
The screws for the ray are hidden underneath the plastic grill, which is held on by 9 plastic clips. To remove it you'll need to very gently pry between the grill and the chassis.
It's really easy to break the clips, I broke 3 in total removing it. Knowing where they would have made it easier but no teardowns exist online at the time of writing this article.
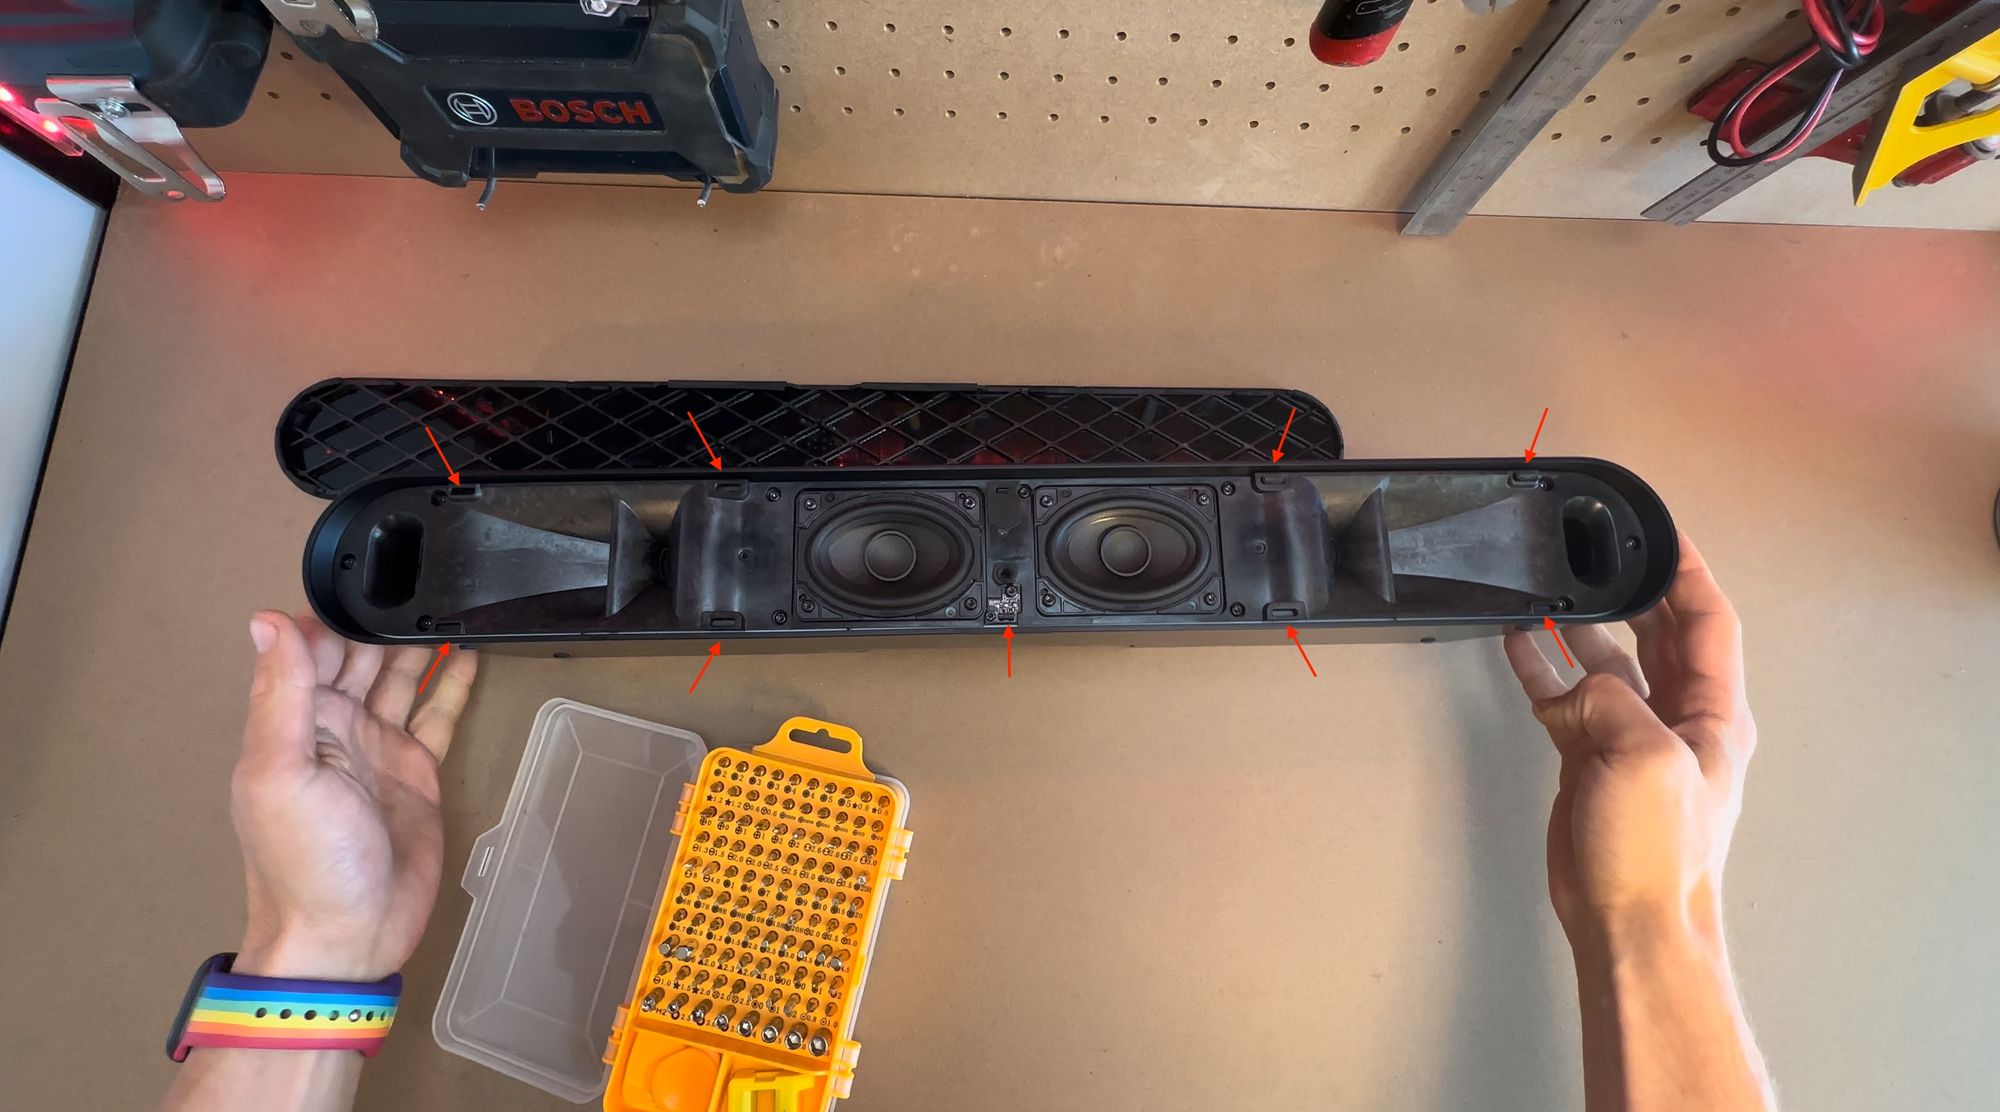
From here you can see the 2 woofers, bass ports and some very creative tweeter porting that looks like it's designed to maximise the sound stage. There's a small circuit board in the middle responsible for the IR receiver.
Next step is to remove the 12 T-10 screws. 11 of them are identical in length at 10mm, with the screw above the infrared board slightly longer at 12mm.
The next part should be familiar for those who've taken a part the Ikea Symfonisk speaker. The front panel is sealed on to the rest of the unit with rubber seals and removing it requires a combination of pressure and patience. To set the panel free you'll need to stick your fingers in each of the bass and tweeter ports and pull gradually.
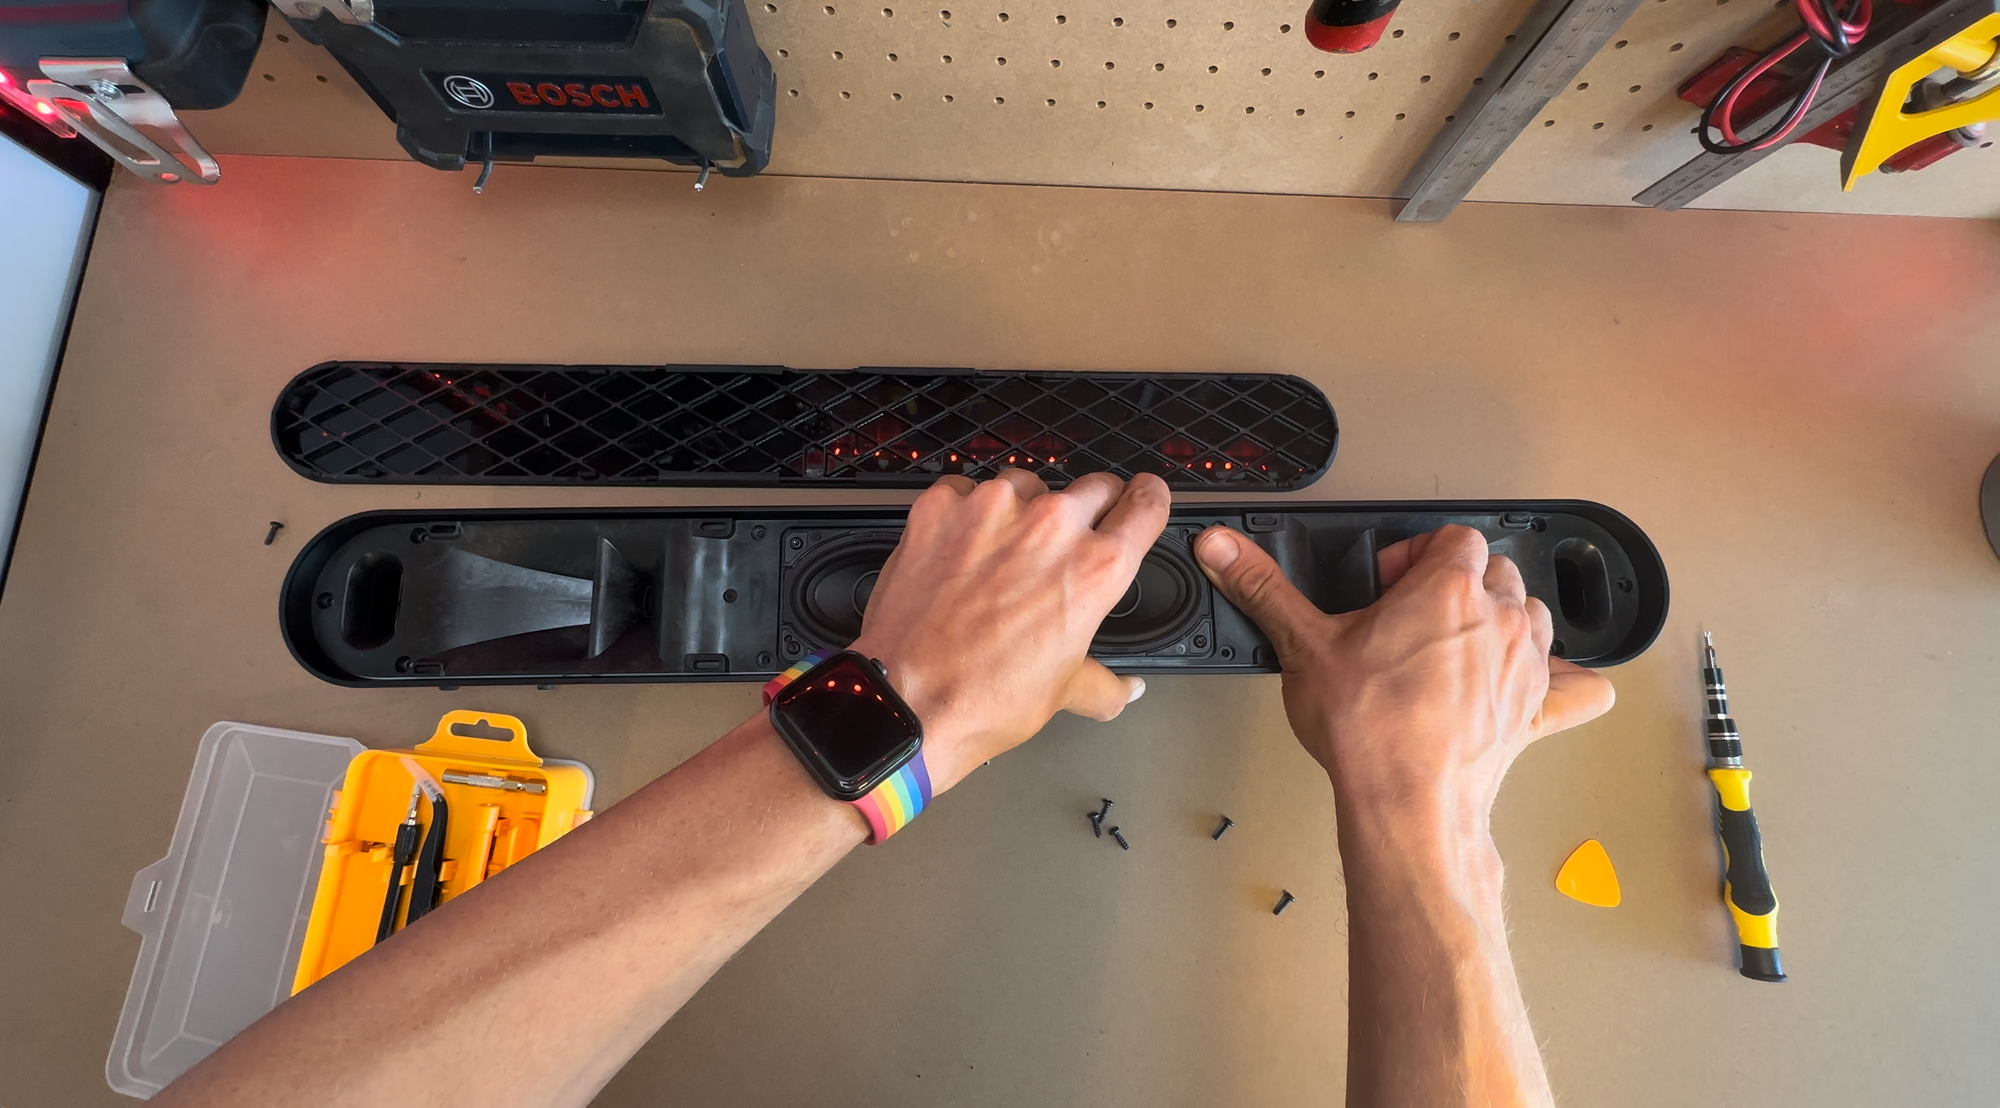
Once you've released it, things get a bit dicey. You'll notice that the panel is stubbornly connected to the rest of the inside via the tight speaker cabling.
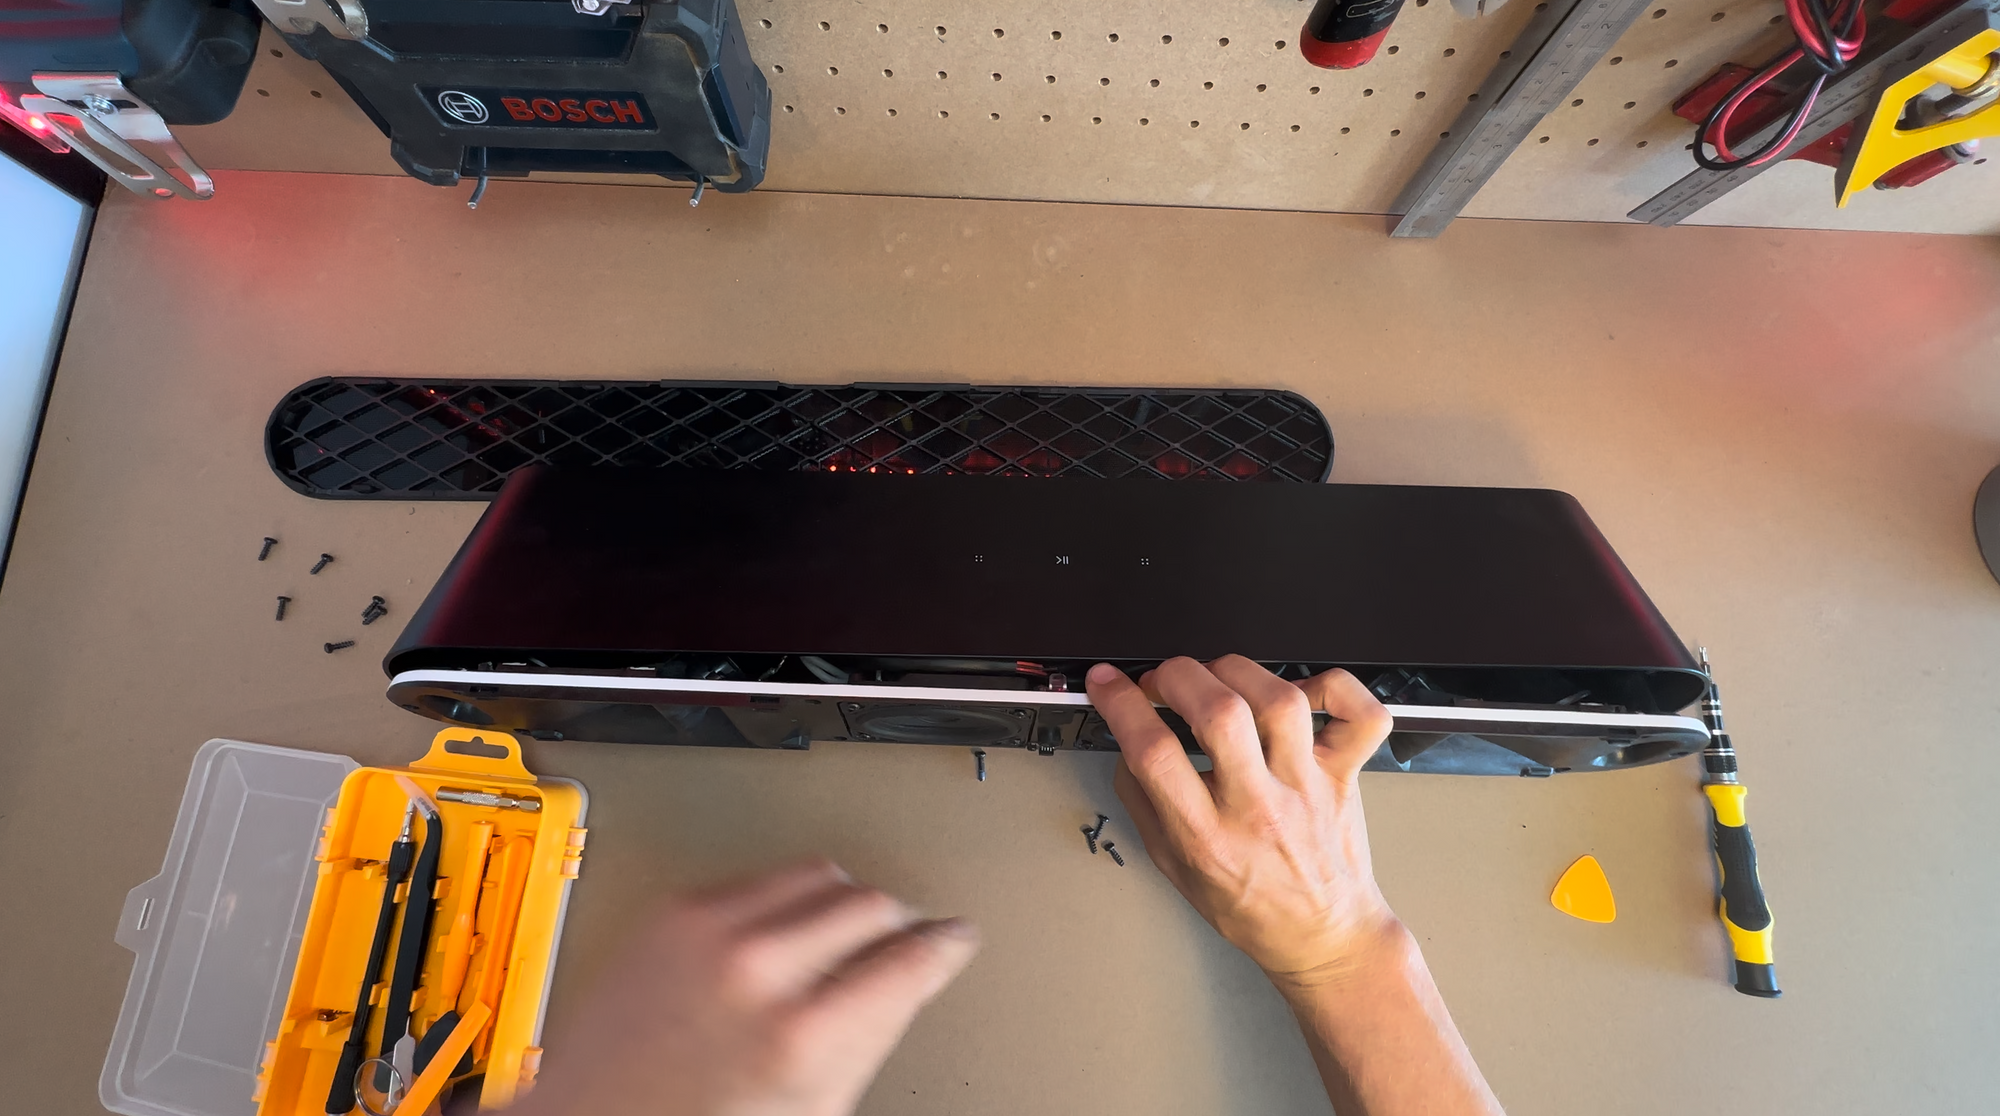
By gently pulling the panel forward you can reach the speaker cables and disconnect them one by one using tweezers. At this point you'll notice that the cable for the infrared receiver will have come loose from the motherboard. That cable is super short and I haven't found a reliable way to remove it any other way apart from pulling the front panel forward.
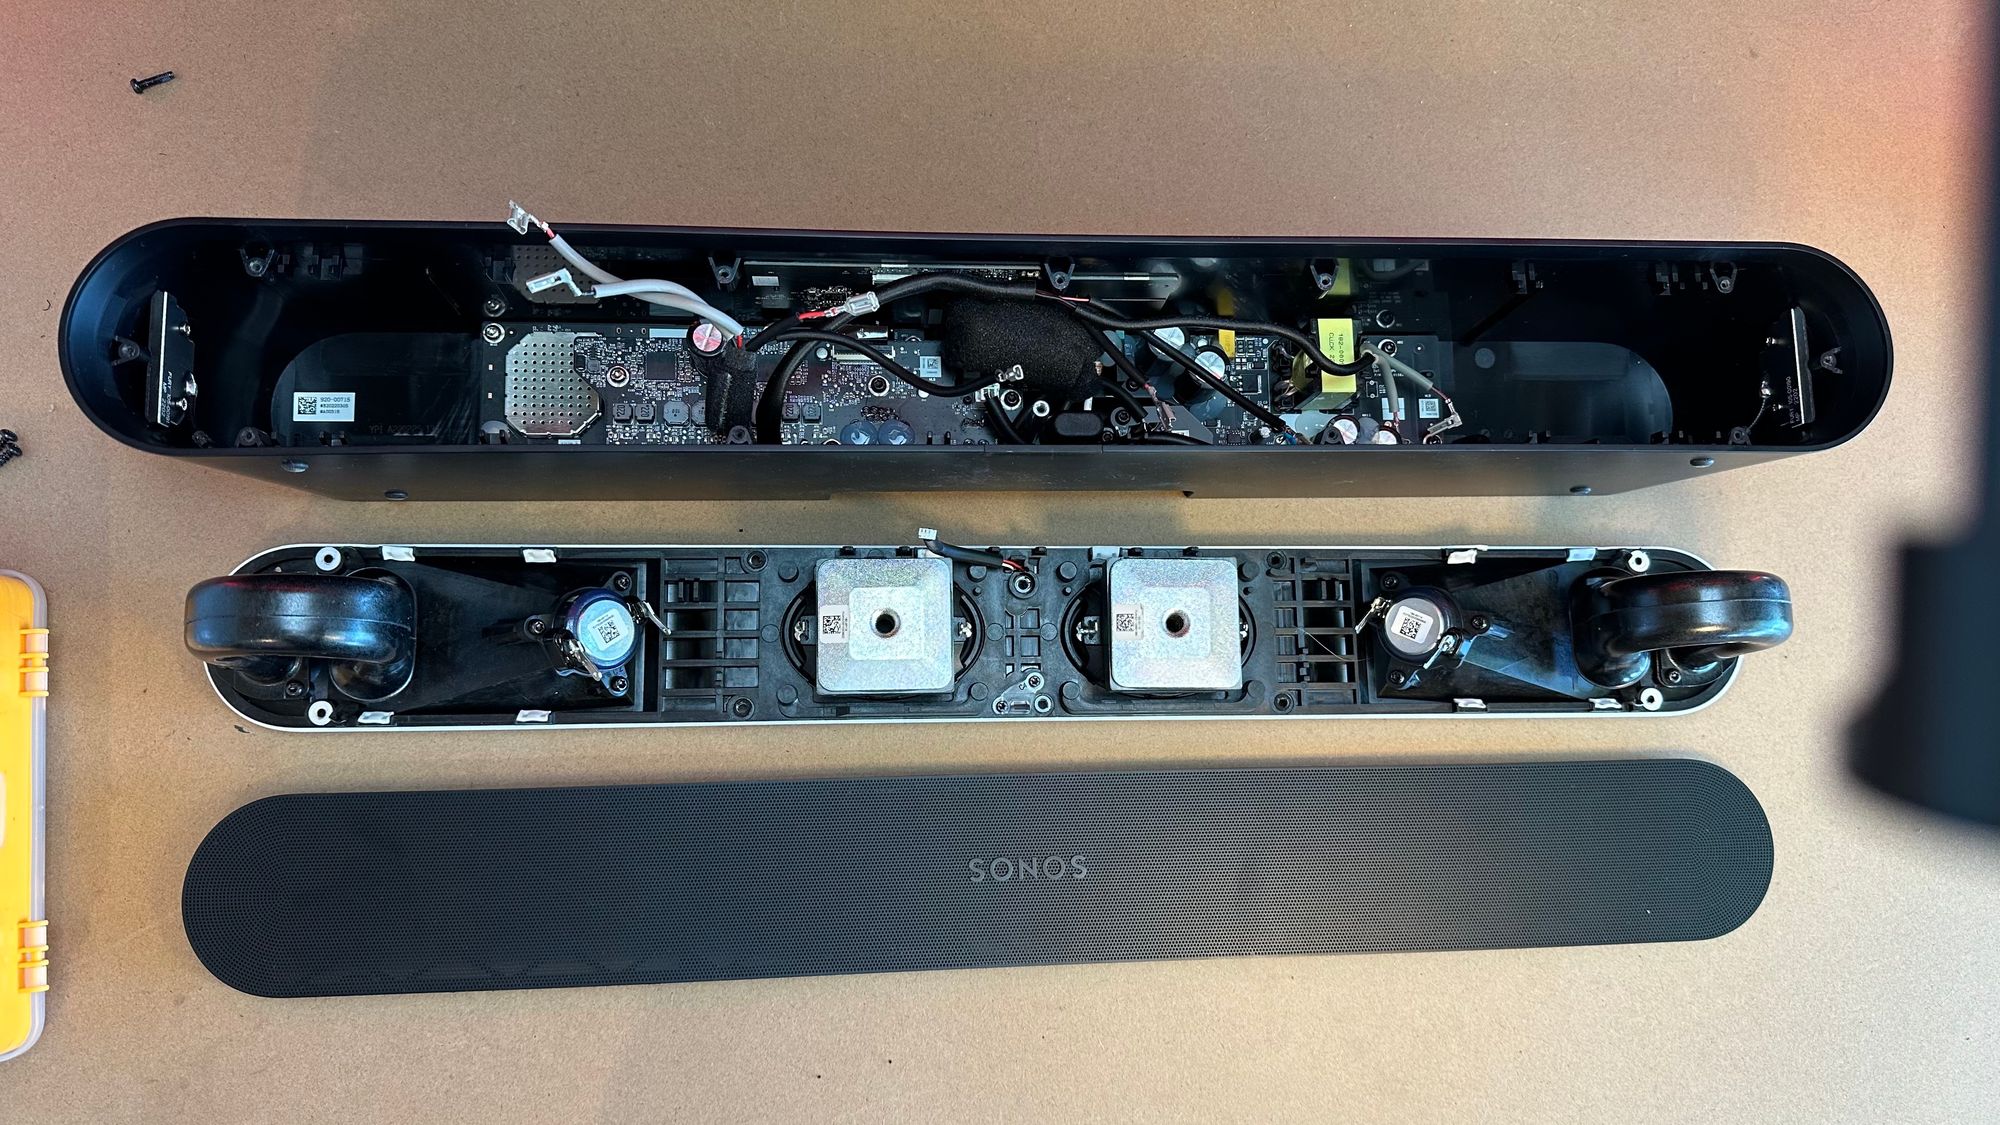
Sweet freedom!
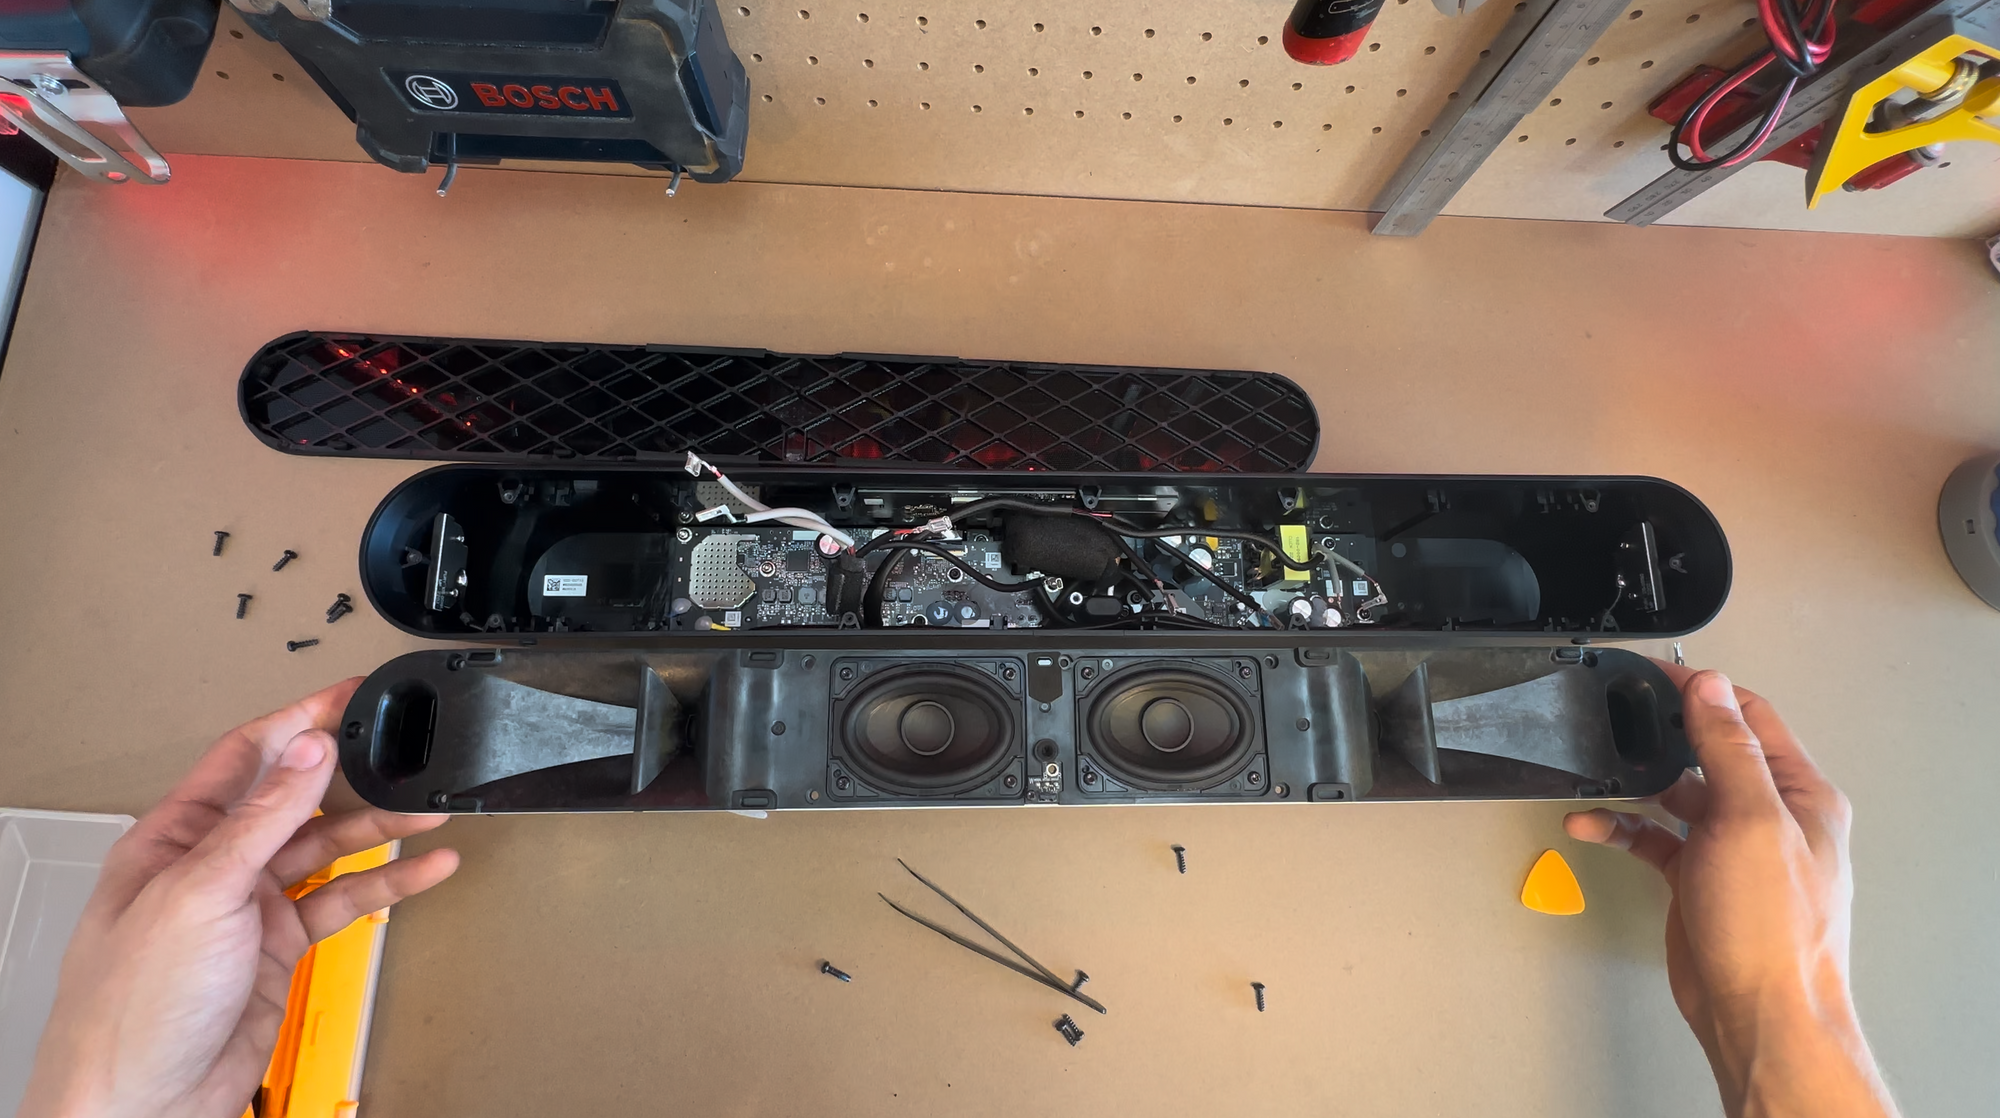
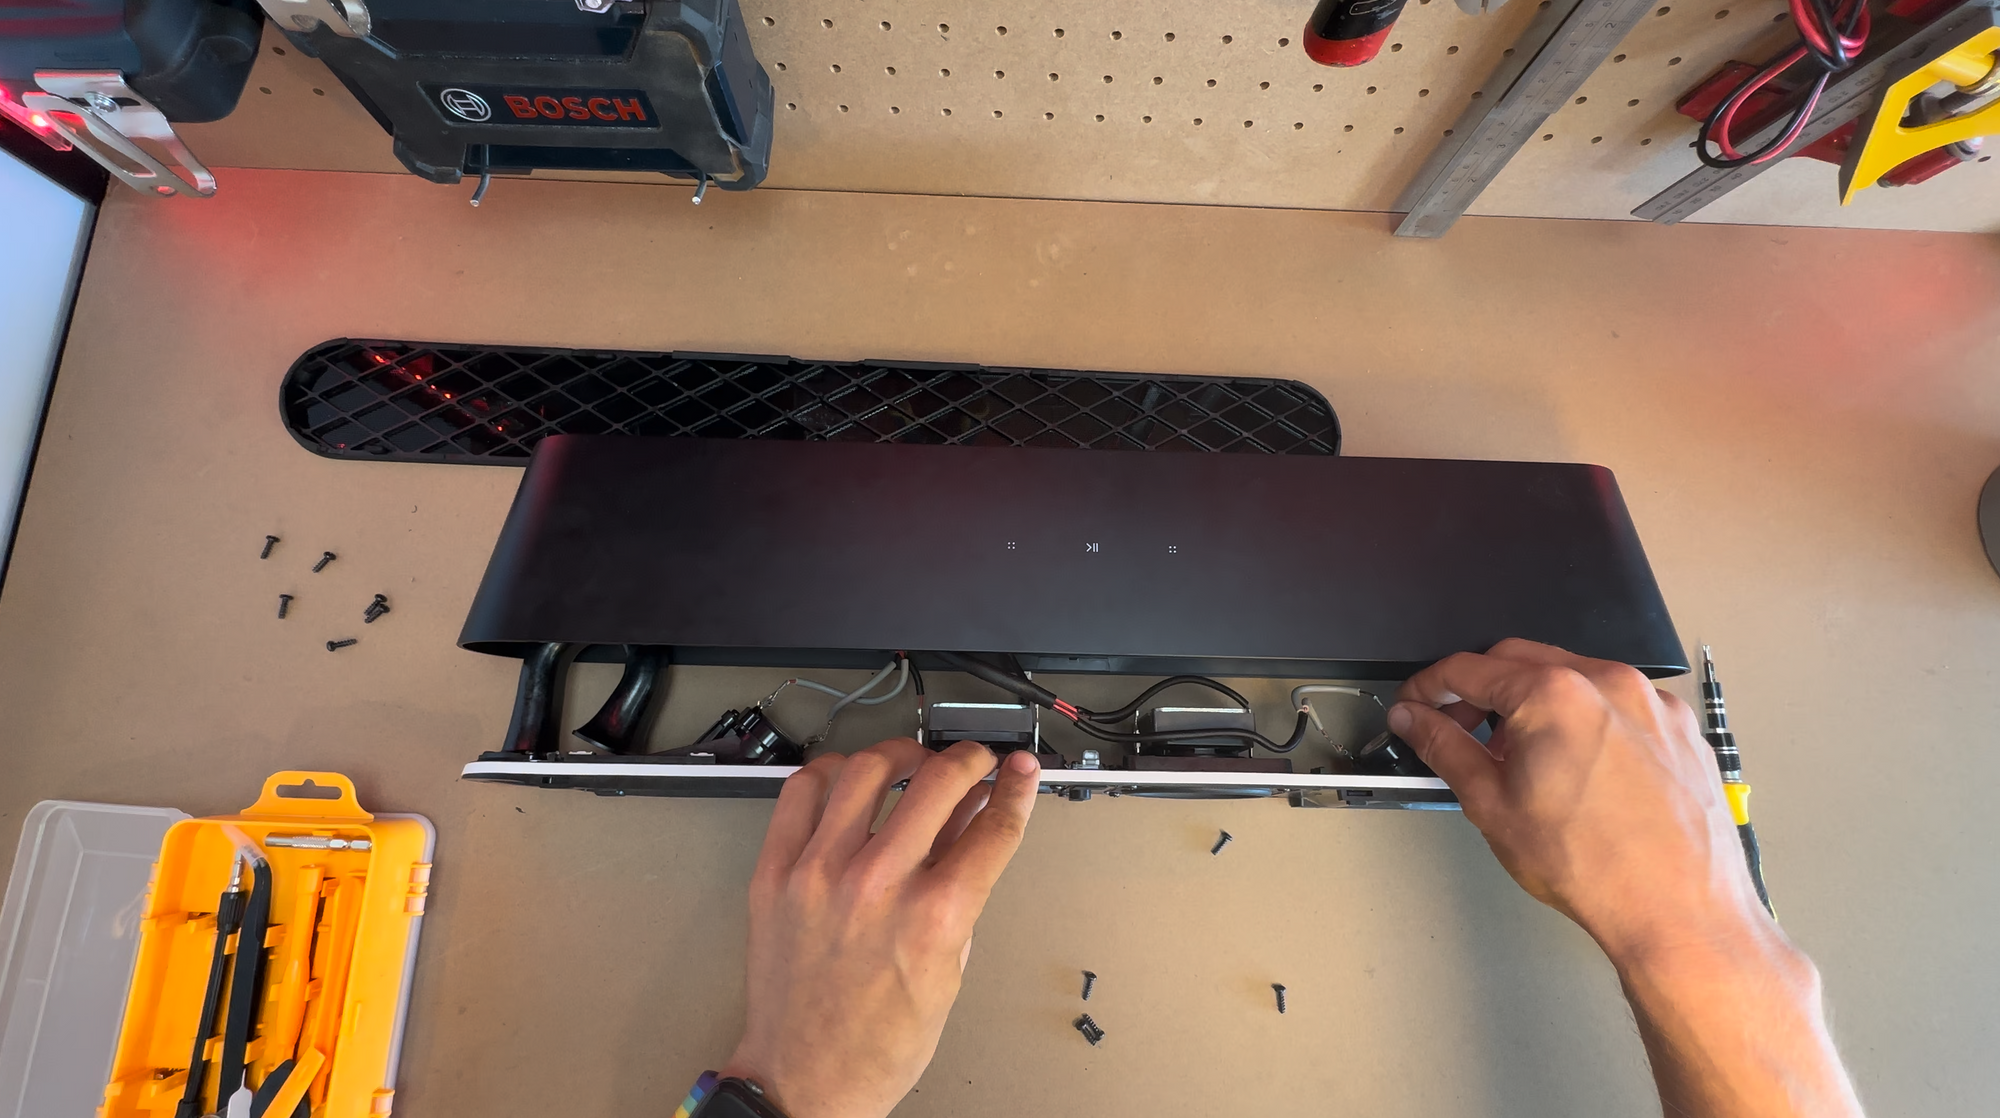
From here you can really get an idea of what the Ray is about. Two eliptical woofers with hefty square backs angled forward in the center, 2 tweeters angled out towards the sides ported to push treble frequencies forward and horizontal, and two ports with a similar horn shape as the Ikea Symfonisk that redirect bass frequencies out of the unit.
As with the Symfonisk speaker, there are some pretty dangerous voltages hanging around in those 400 volt capacitors on the motherboard so unless you know how to safely discharge them, it's best to leave them alone (even when the unit is unplugged). I got zapped by one when opening the Symfonisk and it wasn't pleasant.
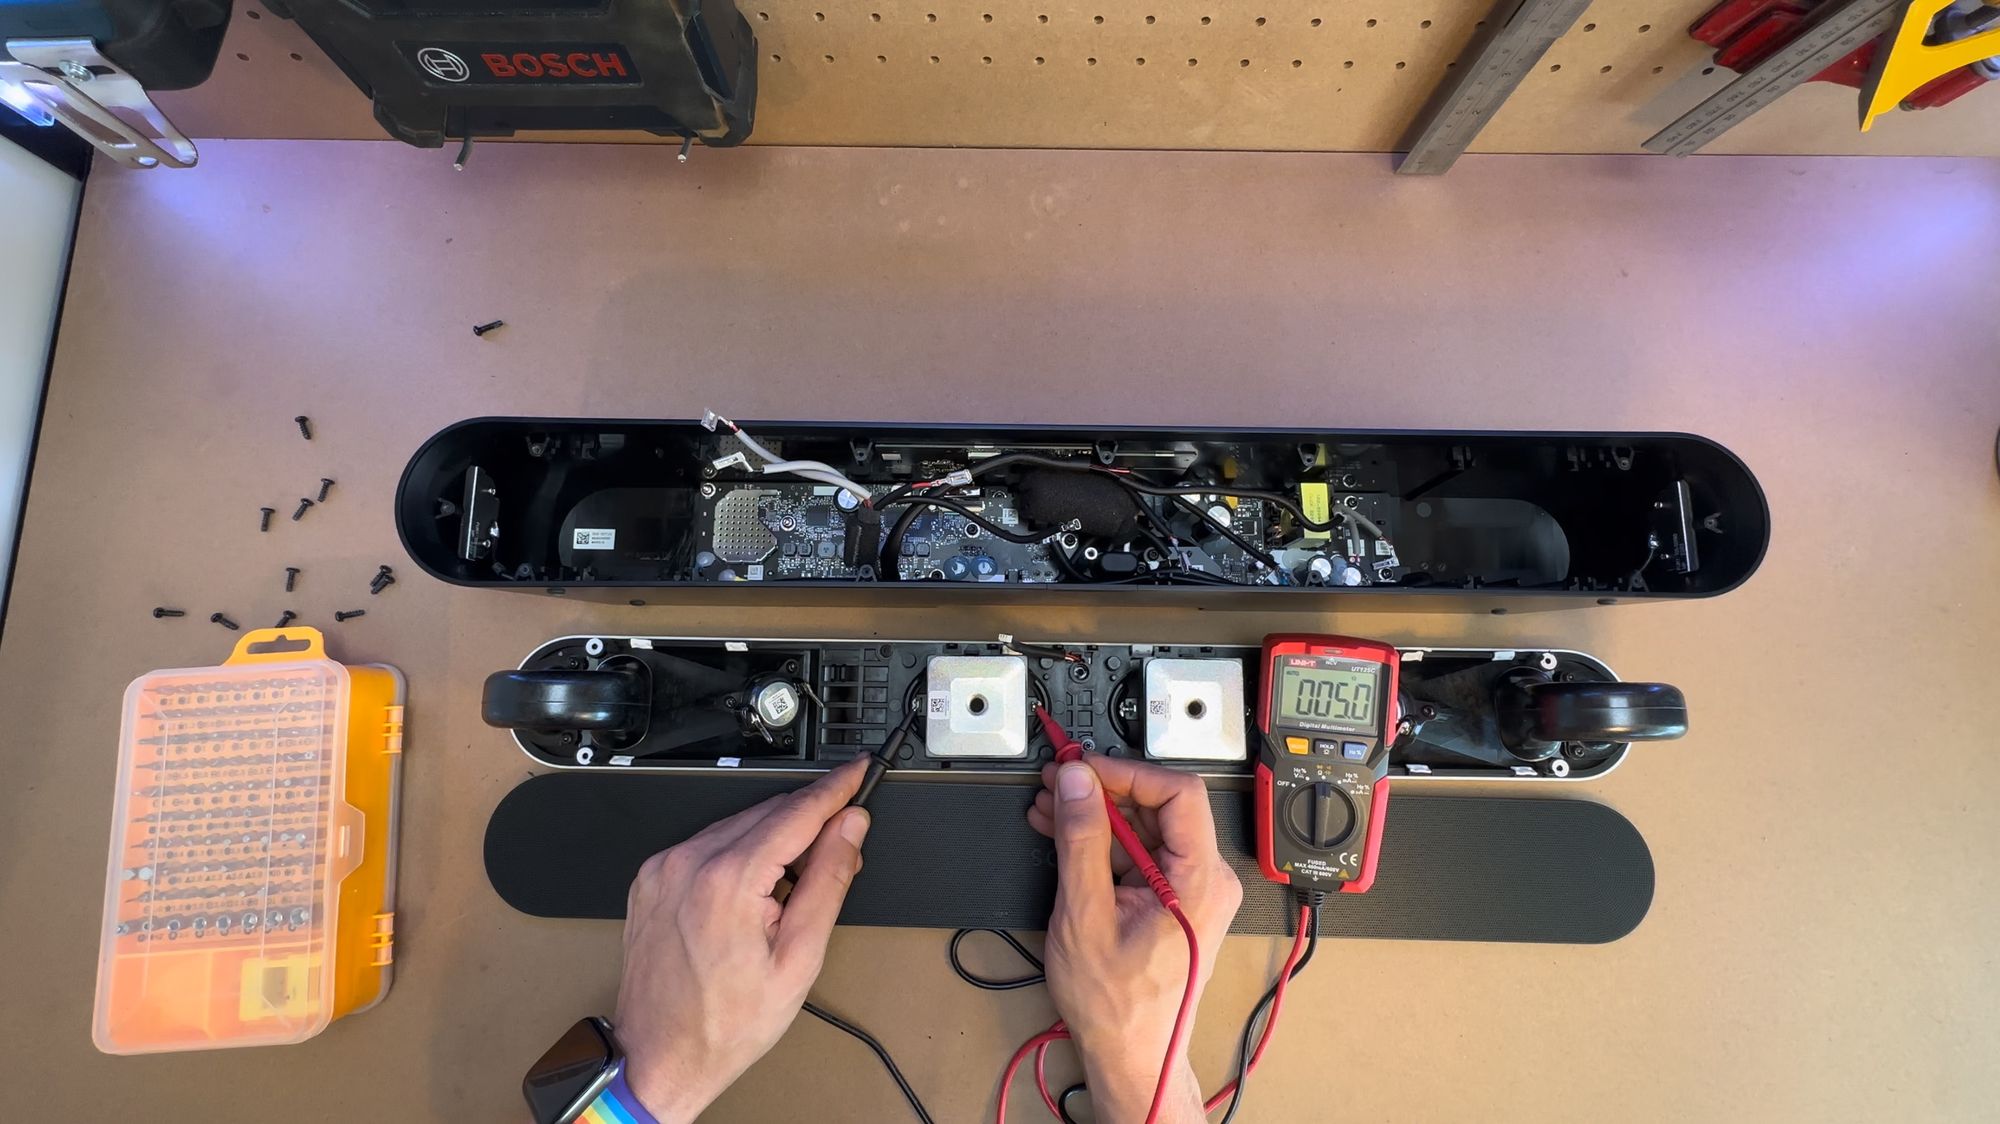
The woofers come in at 5 ohms when measured with a multimeter.
The tweeters come in at 8.1 ohms.
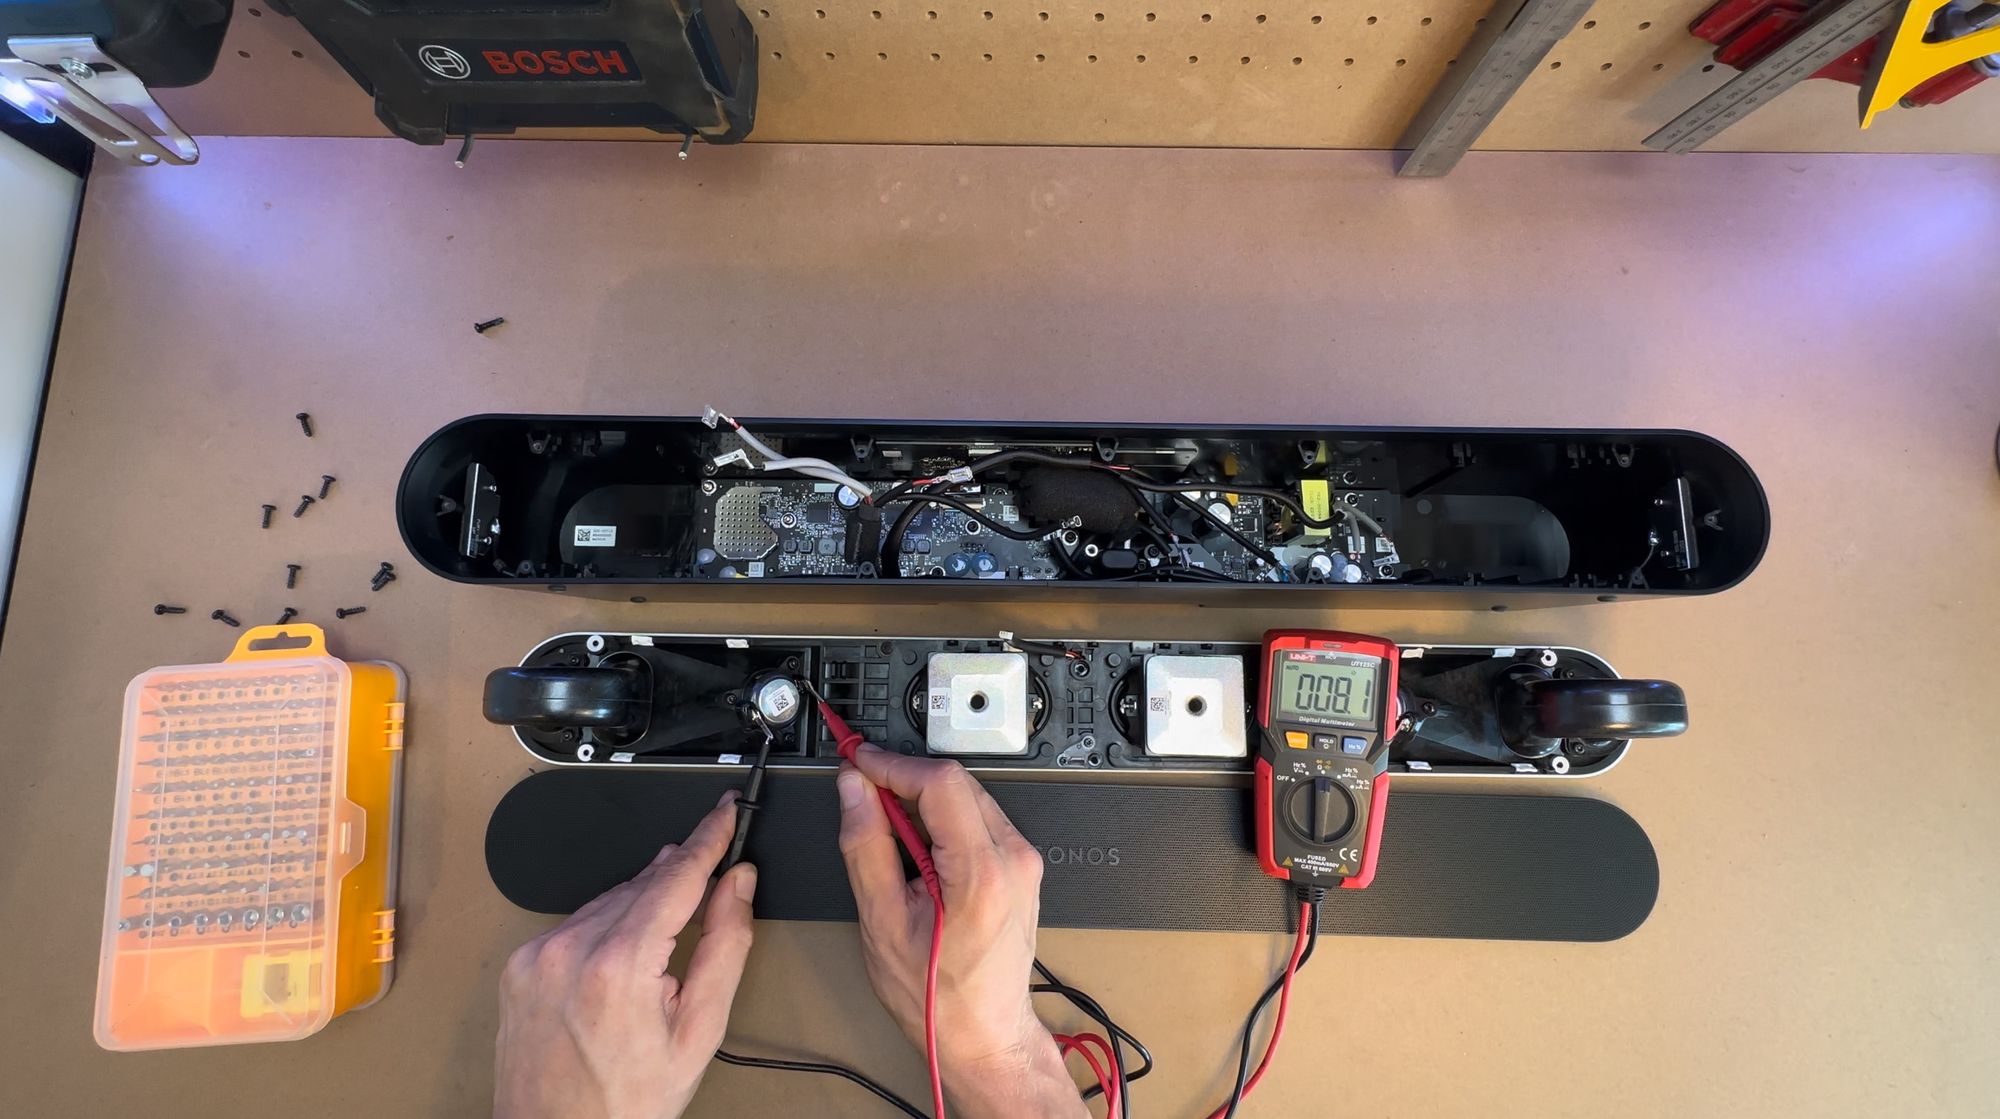
Those resistance levels are perfect, most consumer speakers are between 4 and 8 ohms so rewiring these to drive bigger drivers should be relatively straight forward.
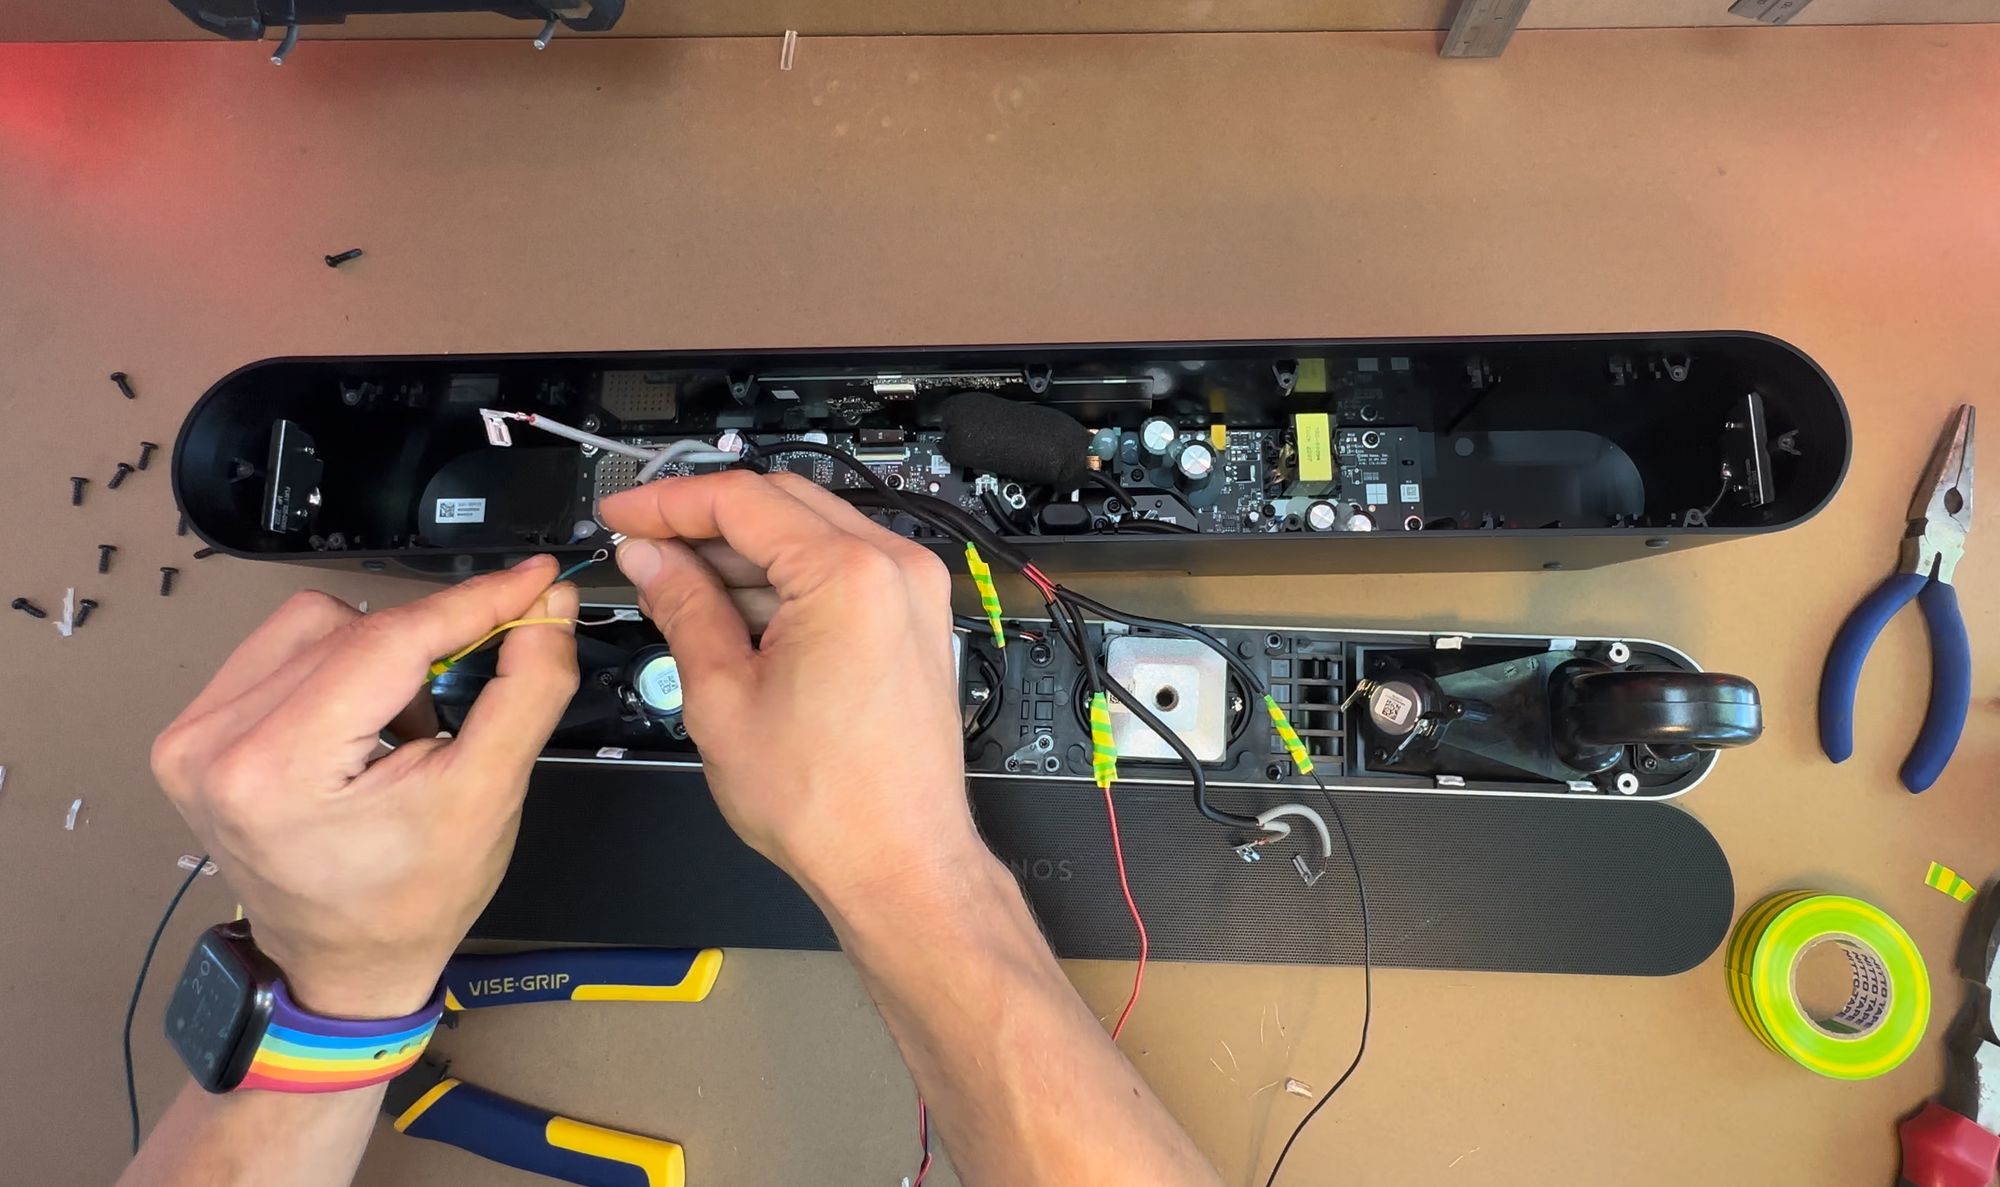
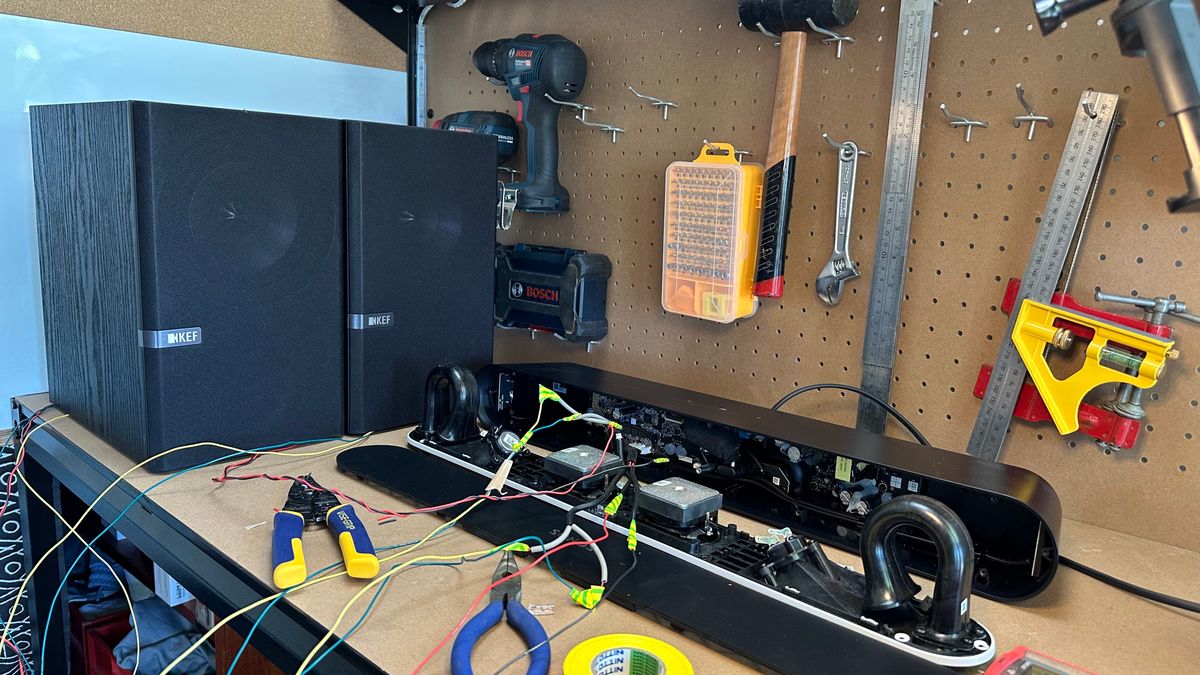
Extending the speaker wires from this point is pretty straight forward. I chose not to do any soldering so that I could easily re-connect the units internal speakers later. One trick is to use solid wire that you can shape into a small loop. From there you can insert the loop into the speaker connector and it forms a pretty reliable connection without needing to use solder. From there electrical tape is your friend ... make sure none of those cables have any chance to short each other.
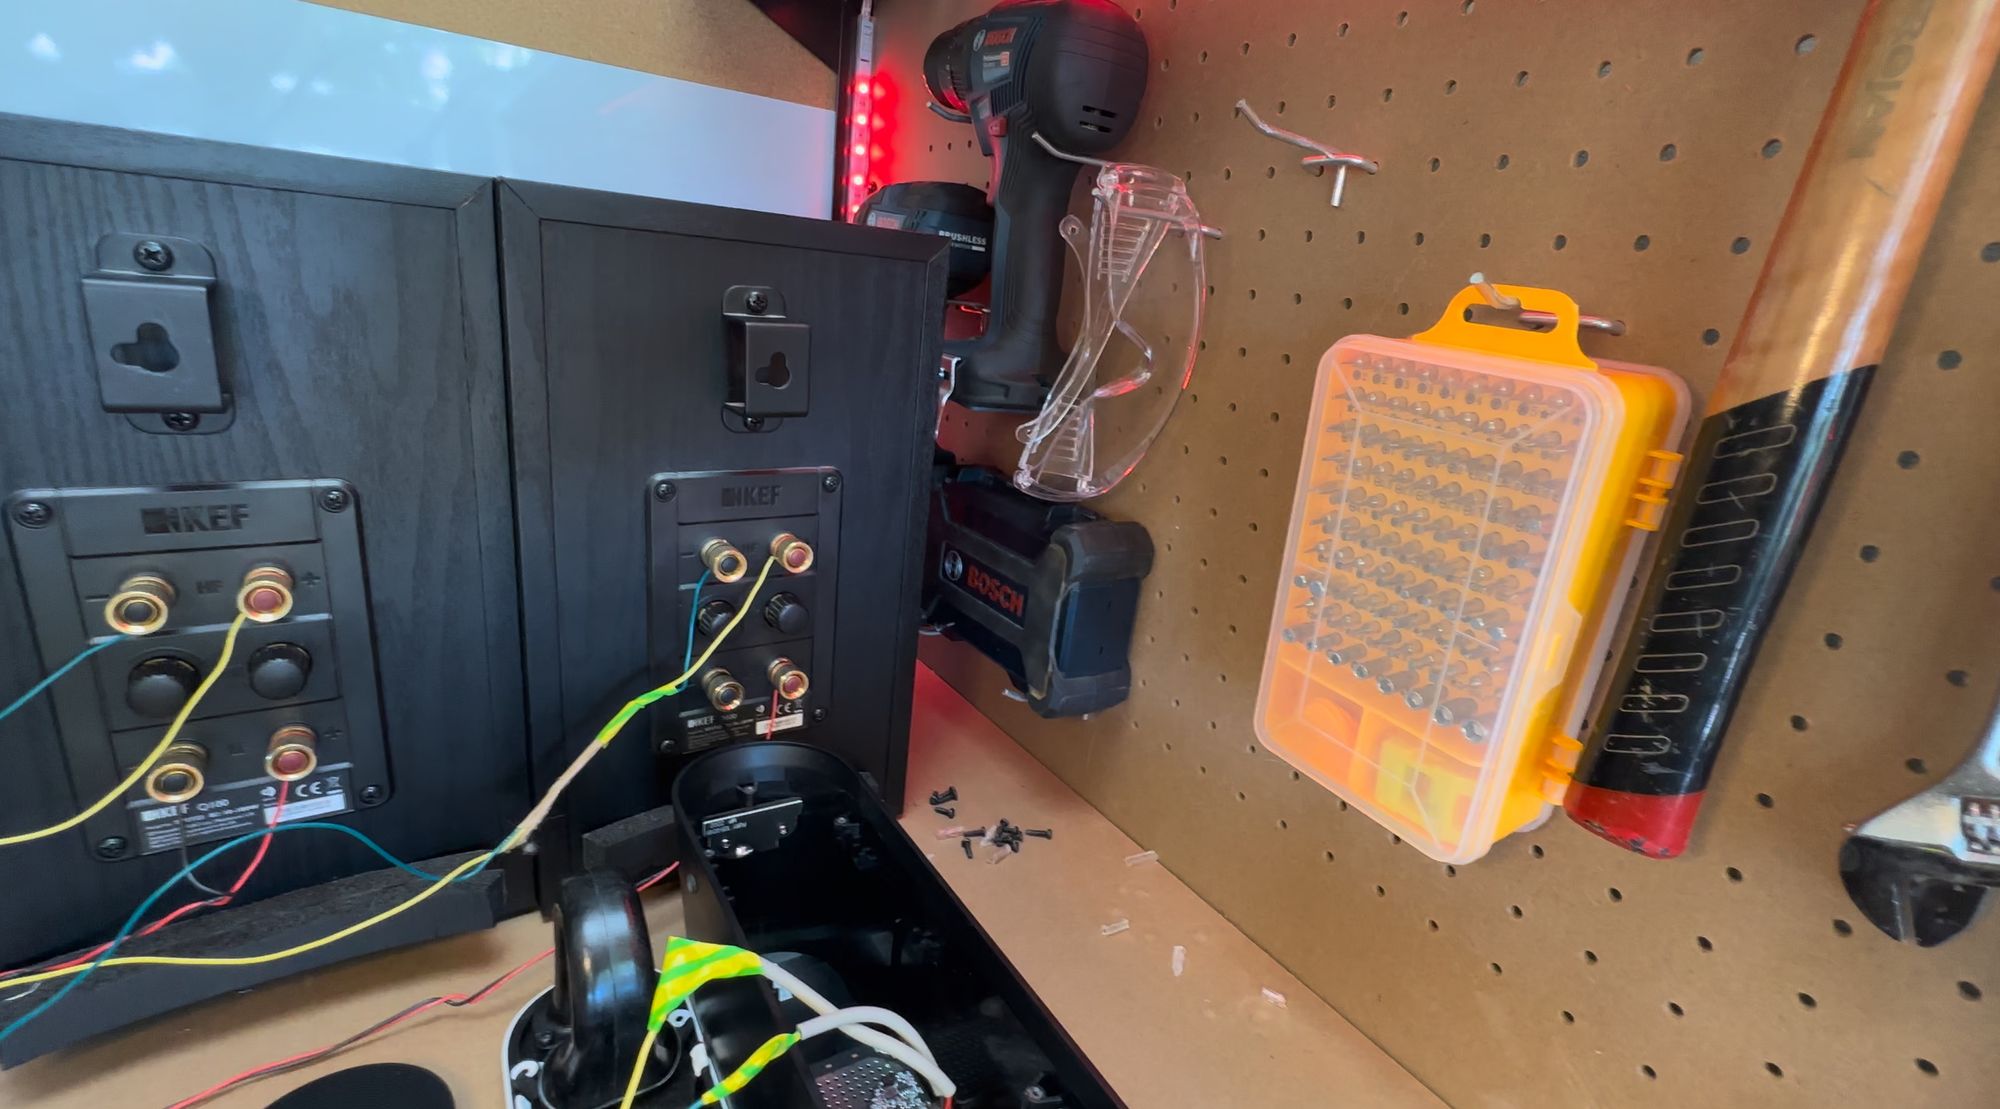
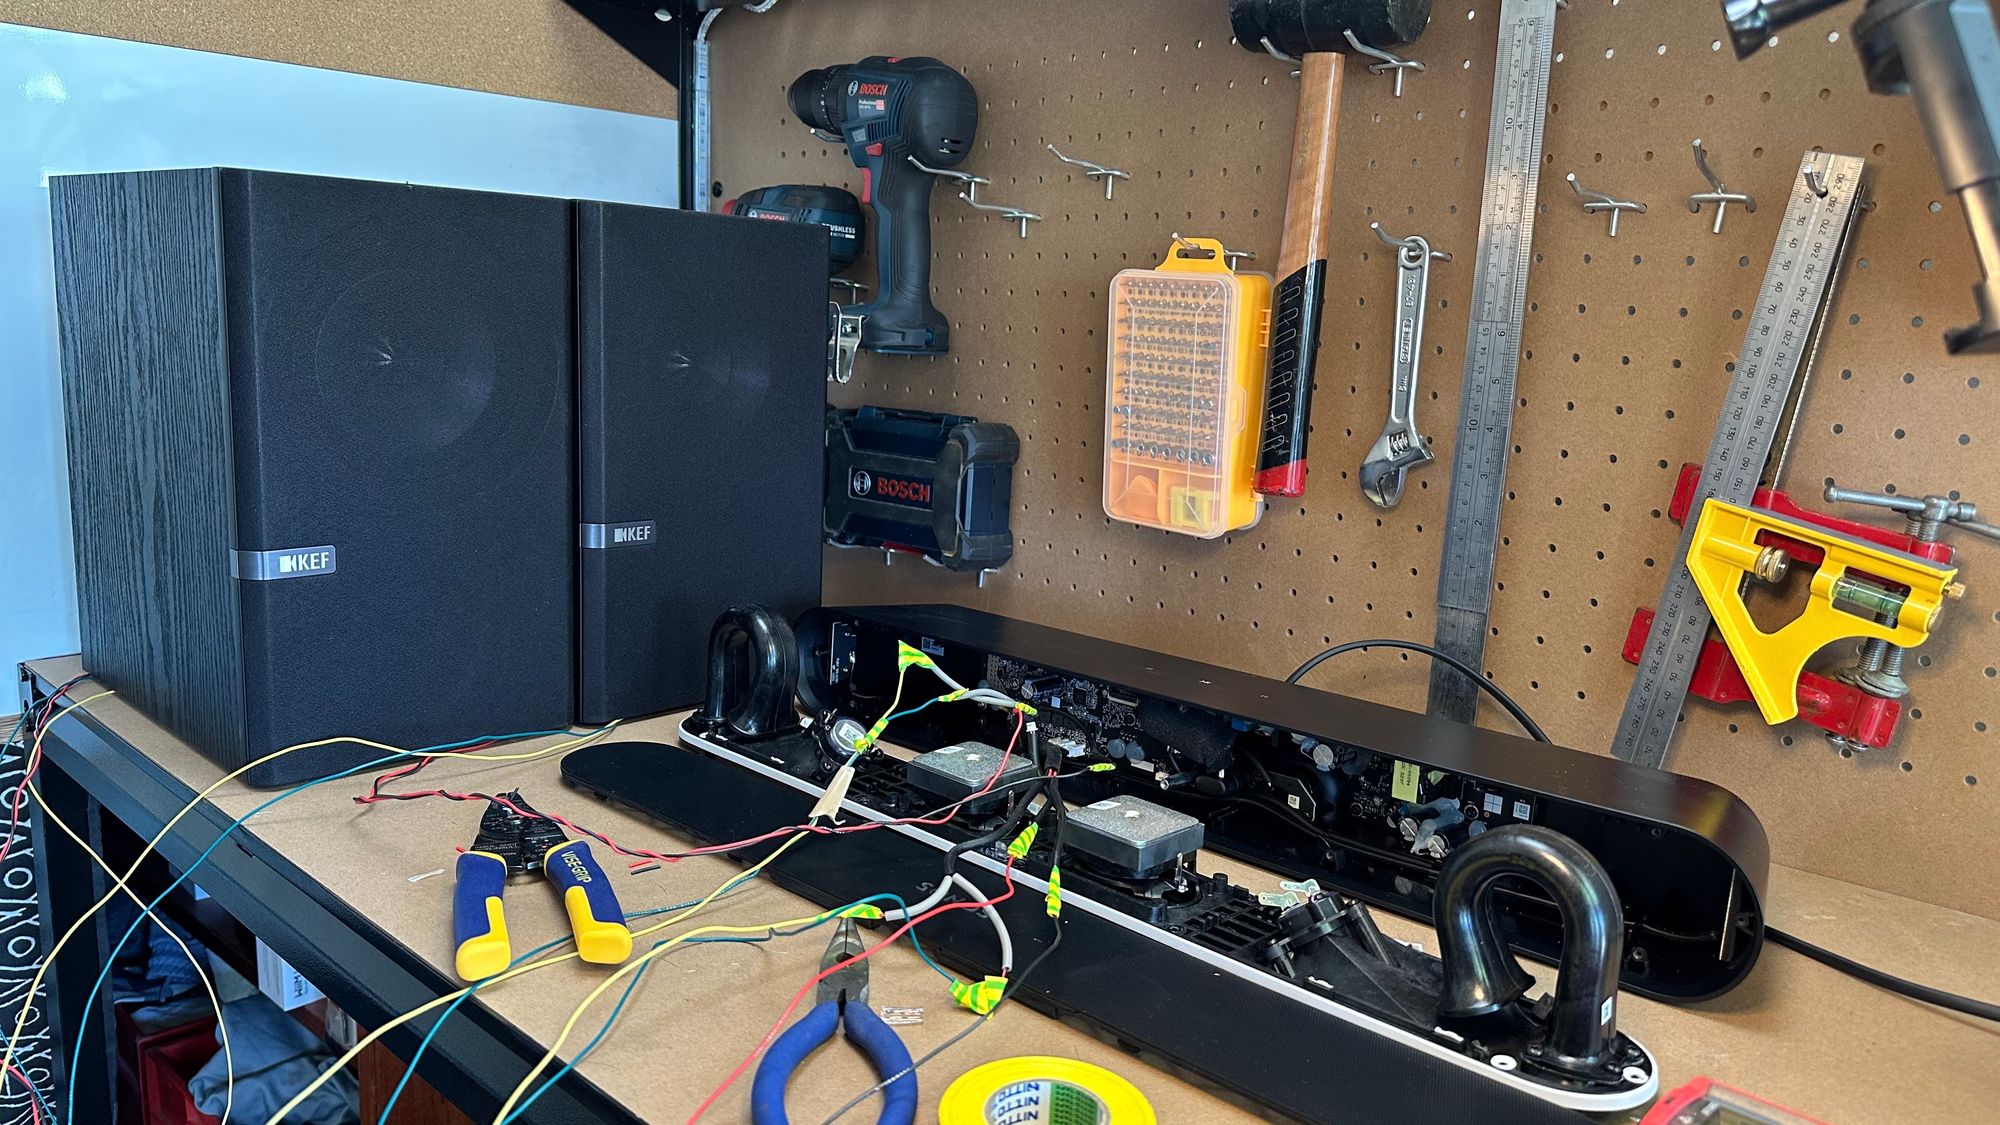
Once all the speaker cables are extended it's time to plug them into my bi-wire KEF Q100's and hoping that the Sonos Ray still boots.
All wired up! The moment of truth ... how do they sound?
More on that in part 2, coming soon!